Wednesday, January 25, 2012

Bulletins

Just wanted to share a quick post on two bulletins I've done this week!

The first is an interactive bulletin I created for our virtual field trips that we are doing via videoconferencing. The tv with the webcam is my attempt at replicating the TANDBERG, the videoconferencing system we are using.
The font for the heading is from dafont and is called Appleberry.
We've already "been" to New York...you can read all about our experience in this post. For the other four trips, I have clues/riddles where the students can try to guess where we are going next! I put the clues in sleeve protectors, and I'll reveal our trips to the students as we approach them. Then I have little blurbs prepared about what the students will have done at each videoconference.

The font for the clues is from Kevin and Amanda and is called Pea Hollee.
Can you guess from the clue above what our second virtual field is?!


The other bulletin I did this week was displaying the students' mouse shapes from our unit on shapes.
The font I used is from dafont and is called DK Crayon Crumble.


Happy Wednesday!!

Friday, January 20, 2012

Shapes

I taught a mini-unit on shapes this week!

In Virginia, the public school curriculum follows the Standards of Learning (SOLs). Here are the SOLs that apply to my mini-unit:

Geometry, Focus: Characteristics of Plane Figures
1.12 The student will identify and trace, describe, and sort plane geometric figures (triangle, square, rectangle, and circle) according to number of sides, vertices, and right angles.
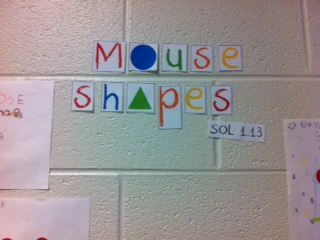
1.13 The student will construct, model, and describe objects in the environment as geometric shapes (triangle, rectangle, square, and circle) and explain the reasonableness of each choice.

Day 1: Sides, Vertices, and Angles (35 minutes)
First, the students and I echo read a song about shapes. I also taught them motions to do with the song (making a circle with our arms, air tracing, etc.) You can get a copy of the song here. I did not create the song (I'm not sure where I learned of it!). I also had shape friends to accompany us: circle, triangle, square, and rectangle. Again, I'm so sorry, I can't remember where I got these shapes! I do know I downloaded them for free.

Then, I called them to the carpet to sit on a circle that I had outlined with tape.
I would make the shapes larger next time so the students wouldn't be as squished.
We created a SMART Notebook of what they already knew about shapes. Then, they all received mini-white boards. I had them sit on the outline of each shape while we completed a chart on the number of sides, vertices, and angles of each of these four shapes. They wrote the number of sides, vertices, and angles on their white boards (simultaneous interaction) while I wrote their answers on the SMART Board. I really liked having them sit in the form of the shapes we were talking about because I could ask, "Who is sitting on the vertices?", etc.

Day 2: Let's Explore Shapes! (1 hour)
We began the lesson by echo reading our song about shapes from the previous day. Then we did stations! I prepared five stations and had 4 to 5 students at each station. They spent ten minutes at each one. I used this timer to keep track of time. The students loved to count down the last ten seconds!

Station 1: Candyland Shapes
I bought Candyland (only $5.88 at Walmart!), actually I bought two because it was so cheap! Then I glued shapes cut from construction paper onto the board. I also made game cards and had them laminated. I don't know what it is about Candyland (perhaps just the fact that pictures of candy cover the board?) but the kids can't get enough of it.


 2. Playdoh
The students made shapes with Playdoh and had to sort them. I created this mat for sorting and had it laminated so the Playdoh wouldn't stick to the card stock.  The kids LOVE, LOVE, LOVE Playdoh.

3. Mystery Shapes
Given clues, the students had to identify shapes. I told the students they had to be detectives, and they got to wear special detective goggles (sunglasses).

4. Shape Hunt
Given lots of shapes, the students had to color the circles red, squares blue, etc.

5. Body Shapes
Students made shapes with their bodies. I was at this station taking pictures of them.


Day 3: Shapes Are All Around! (1 hour)
We began with our shape song again. They seem to love songs! That is one of my favorite things about this age group...their love of singing and dancing! Then I read The Greedy Triangle by Marilyn Burns. I involved them in the story by asking them to name the shapes they saw.

Next, I showed them a prezi that I had created of shapes in the environment. I had created shape signs for each student so when I showed them a picture from my prezi, they would hold up the shape(s) they saw in the picture. Then I would call on them to tell the class where they saw that particular shape in the picture. 

The last part of the lesson, the students went on a shape hunt looking for shapes in our classroom environment. After this lesson I decided I didn't like the recording sheet I used but I did find this one from Crazy for First Grade. Too bad I didn't find it earlier but next time I will definitely use that one! To close the lesson the students had to post to our Shapes Parking Lot (Pinterest inspired). I gave each student a post-it, and they drew one object they found in their shape hunt. Then we had a brief class discussion about the shapes they posted.
Sorry that I look like such a zombie in this picture! I was waiting for a student to answer, you know, giving adequate wait time. :)

Day 4: Shape Party! (45 minutes)
I brought out the shape signs again from the lesson before. AND we did the Hokey Pokey shape style! Put your circle in, take your circle out, etc. I really wish I had pictures/video of this because the students were so cute! I was subbing for the second half of the day though so my MT wasn't there to take pictures for me. Next, I had brought food in my insulated picnic basket for the students to sort and then eat. This kind of turned into a slight disaster though because some of the food, like the graham crackers and doritos, were soggy! This was actually kind of funny though too! The kids were like, "Miss Jaffee, why are you feeding us this?!" I had prepared the food in individual baggies ahead of time (to save time and mess during the lesson) and had stored it all in my picnic basket in the fridge because I had some snacks that needed to be refrigerated. Like I said though, this was not a good situation for the crackers and chips! Oh, well. Live and learn, right?
My insulated picnic basket rocks! My mom gave this to me for my birthday one year. I think it's from Avon.

While the students were sort of eating their snacks, I played a slideshow for them with the pictures from our body shapes station (from day 2's lesson). I made the slideshow with Keynote (like PowerPoint but for the Mac) and converted it to a mov.file so it would play on the Windows computer at school. I put a song to the slideshow too. They loved it! We watched it four times!

The last activity we did was I read the story Mouse Shapes by Ellen Stoll Walsh.
Then the students made their own mouse with shapes!

Let me know if you have any questions! I hope you enjoy these resources!

Happy Weekend!

Wednesday, January 18, 2012

Readers' Theater and Videoconferencing

Have you read Gerald and Piggie by Mo Willems?! Mo is one of my absolute favorite children's book authors, and his Elephant and Piggie series is so witty, entertaining, and fun! I decided to use several of the Gerald and Piggie books for Readers' Theater. These books work out perfectly for Readers' Theater because they are already written in dialogue. These books are also great because most of the kids are familiar with them so I feel like the stories have more meaning for the kids compared to traditional Readers' Theater scripts (that can sometimes be a little dry).

The students read the following Gerald and Piggie books:
1. There Is a Bird on Your Head!
2. I Love My New Toy!
3. My Friend Is Sad
4. Watch Me Throw the Ball!
5. I Will Surprise My Friend!
6. I Broke My Trunk!
7. Happy Pig Day!  

Gerald and Piggie are in every story but in some of the stories there are other characters that have small parts. That's how I was able to offer each student (we have 23) a role.

I thought the students would be all Gerald and Piggied out after rehearsing their skits everyday for a week but they couldn't get enough of these silly characters...they were constantly asking me if they could borrow the books during any free reading time!

Here are a few of the kids reading one of the books together!

They even asked if we could read them during story time where I read a book to the whole class everyday before lunch! Reading the books as a whole class was great because we would read them together...the girls would read Piggie's part and the boys would read Gerald's part.

The coolest part about doing this particular Readers' Theater was that the kids performed their skits for a second grade class in New York through videoconferencing (like FaceTime or Skype)! The school I am student teaching at has a videoconferencing system called TANDBERG. They students thought they were going to be famous because they were going to be on "tv". Aren't they funny?!


The kids LOVED this!! As you can see in the picture above, TANDBERG is basically this portable television with webcam on top (it has other awesome technological capabilities too). I put x's on the floor so the students would know where to stand when they were doing their skit. I sat below the tv (out of view of the camera) holding the books for the kids to read. The students sat across from the TANDBERG. And since the students would see themselves in a small corner of the screen along with the class we were connecting with, we let them make silly faces in the camera for about 10 minutes to get their wiggles out.

I had prepared costumes and props for the students to wear and use too! They did an awesome job performing...wonderful expression and acting! They were also a great audience (so engaged!) while watching their classmates (we had a talk about being a good audience before we got started)! In between the skits, while my Cooperating Teacher and I were preparing the next group, the ITRT would zoom in the camera on the kids so they could wave to the second graders in New York!


 I am so happy with this experience! I would definitely do this again and recommend videoconferencing with Readers' Theater.

Have you used videoconferencing in the classroom? If so, what did you and your students do?


Monday, January 16, 2012

Blog Button

Here is my blog button! I created it using Picnik. 
I prefer a clean, minimalist design but Picnik does have lots of options and most of it's features are free to use. 
I used instructions from eHow to do the technological stuff.

You can grab my button with code on the sidebar to share or link to my blog. 
Enjoy!


Sunday, January 15, 2012

Morning Work

Greetings, Friends!
Hope you're enjoying the three-day weekend! I've been in my PJs aaaaalllllll day with Friends on in the background while I prepare school stuff. I am teaching my first unit this coming week on shapes. I'll be sure to post about it next weekend.

The last two weeks my Cooperating Teacher has given me responsibility for morning work. I noticed right away the students were struggling with writing so I have been giving them fun prompts to practice and improve upon their writing skills. I'd like to share some of their writing with you (they are so cute and funny!):

These rules crack me up!
Writing Prompt: If you were president, what are five rules you would make?
Love #5. :)


Writing Prompt: If you could spend one day with a famous person, who would it be and what would you do?


Some mornings I have given them math related assignments instead of writing. For example, they had to estimate how many bears were in a jar. The wrote their estimate on the board. They LOVE writing on the board!

Another day,  we voted for our favorite color and then I used the data to create a graph that they answered questions about. They were really funny about voting...they wanted to include their parents and siblings' favorite color too!


What do you do for morning work?!


Thursday, January 5, 2012

Hello, World!

I'm so excited to join the teaching blog community as a blogger! I have been reading teaching blogs (some of my favorites are linked in the side bar) for many months. All of the amazing educators I have been reading about have made me feel especially inspired and enthused about creating my own classroom. But why wait to start a blog until I have my own classroom? I love to share and am eager to learn!

I am currently pursuing my master's degree in elementary education at the University of Mary Washington (UMW). I started this graduate program immediately following my undergraduate degree where I earned a Bachelor of Arts in Linguistics and Child Language Development, also from Mary Wash. As an undergrad, I took education courses and had several practicum experiences in addition to my major program. I recently completed the fall semester of my grad program, where I took education courses and student taught in third grade two days a week. Currently, for the spring semester, I am student teaching full time in first grade and will be performing action research on Virtual Field Trips: Videoconferencing as an Enriching Educational Tool. You can view my research proposal presentation here. I have loved my educational experience at UMW but am excited to graduate in May (on my 23rd birthday!) !

Organized is something I LOVE to be so I thought I would share how I have organized my student teaching stuff. First, is my teaching bag!


This bag rocks! I love the long straps, the three outside pockets, the vinyl material (easy for cleaning), and it has a zipper top. I bought it at Pepperberries, which is local to Culpeper, Virginia.

Here is the spacious inside:


In my bag, I have my student teaching binder and planner.
free font used: KG Like a Skyscraper from dafont


free font used: Later On from da font
In the front of my binder, I have my student teaching timeline (left folder) and a ziplock bag that I three-hole punched (Thanks, Pinterest!) to hold my notebook. I also included a table of contents for my university supervisor to easily navigate through my binder to find my plans.

 LOVE this planner from Poketo!

little folder on inside cover (shown) and back cover (not shown)


As you can see, the front of the planner has layouts for entire months followed by weekly layouts. You circle the month and write in the dates. I use my planner to keep track of important dates like due dates for school assignments as well as social stuff, etc.

Like I mentioned earlier, I am so excited about starting this blog! I welcome any questions, suggestions, comments, etc.! Thanks for stopping by!

:) Alex


Site Design By Designer Blogs